Changing the blade on a Ryobi circular saw can seem like a daunting task, especially for those who are new to using power tools. However, with the right knowledge and tools, it can be a quick and easy process. In this article, we will provide step-by-step instructions on how to change the blade on a Ryobi circular saw, so you can get back to your project in no time.
Before beginning the blade change process, it is important to ensure that the saw is unplugged and the blade is completely stopped. It is also recommended to wear gloves and eye protection for added safety. Once you have taken these precautions, you can begin the blade change process. The first step is to locate the blade release button or lever, which is typically located near the blade guard. Press or pull this button/lever to release the blade lock and loosen the blade.
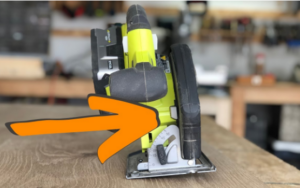
Understanding Your Ryobi Circular Saw
Ryobi circular saws are powerful tools that are designed to cut through various materials with ease. Understanding the different parts of your Ryobi circular saw is essential to ensure that you are using it safely and effectively.
Parts of a Ryobi Circular Saw
Here are the different parts of a Ryobi circular saw:
| Part | Description |
|---|---|
| Blade | The part of the saw that actually cuts the material. |
| Motor | The part of the saw that powers the blade. |
| Base Plate | The flat metal plate that rests on the material being cut. |
| Trigger | The part of the saw that controls the speed of the blade. |
| Depth Adjustment | The mechanism that allows you to adjust the depth of the blade. |
| Bevel Adjustment | The mechanism that allows you to adjust the angle of the blade. |
Safety Features
Ryobi circular saws come with several safety features to ensure that you are using them safely. Here are some of the safety features:
- Blade Guard: This is a cover that protects the blade when it is not in use.
- Safety Switch: This is a switch that prevents the saw from turning on accidentally.
- Electric Brake: This is a mechanism that stops the blade from spinning quickly after the trigger is released.
Maintenance
To ensure that your Ryobi circular saw lasts for a long time, it is essential to perform regular maintenance. Here are some tips for maintaining your saw:
- Keep the blade clean and sharp.
- Lubricate the moving parts of the saw.
- Check the power cord for any damage before using the saw.
- Store the saw in a dry and clean place.
By understanding the different parts of your Ryobi circular saw, its safety features, and how to maintain it, you can use it safely and effectively for your various cutting needs.
Preparation for Blade Change
Before changing the blade on your Ryobi circular saw, it’s important to prepare properly. This includes unplugging the saw and setting up your work area. Follow the steps below to ensure a safe and successful blade change.
Unplugging the Saw
The first step in preparing for a blade change is to unplug the saw. This will prevent any accidental starts while you are working on the blade. If your saw has a cord, simply unplug it from the outlet. If your saw is cordless, remove the battery.
Setting Up Your Work Area
Once the saw is unplugged, it’s time to set up your work area. Choose a flat surface that is large enough to accommodate your saw and any tools you may need for the blade change. Make sure the area is well-lit and free from clutter.
Next, gather the tools you will need for the blade change. This may include a wrench or socket set to remove the blade bolt, a blade lock to hold the blade in place, and a new blade to replace the old one. Lay out these tools in an organized manner so that they are easily accessible.
It’s also a good idea to have a clean cloth or rag on hand to wipe down the saw and blade. This will help prevent any debris from getting into the motor or blade housing during the blade change.
By following these steps to prepare for a blade change, you can ensure a safe and efficient process. With the saw unplugged and your work area set up, you’re ready to move on to the next steps of changing the blade on your Ryobi circular saw.
Removal of the Old Blade
When it comes time to replace the blade on your Ryobi circular saw, it’s important to do it properly to ensure your safety and the longevity of your tool. Here’s how to remove the old blade:
Locking the Blade
Before you start working on the blade, make sure the saw is unplugged or the battery is removed. Then, locate the blade lock button on the top of the saw. Press and hold the button down to lock the blade in place. This will prevent the blade from spinning while you work on it.
Loosening the Blade Nut
Next, use a wrench to loosen the blade nut. The blade nut is located in the center of the blade, and you’ll need to turn it counterclockwise to loosen it. Be sure to hold the blade in place with your other hand while you loosen the nut, as the blade may spin slightly.
Once the nut is loose, remove it and the outer washer from the blade. Then, carefully remove the blade from the saw. Be sure to inspect the blade for any damage or wear, and replace it if necessary.
That’s it! With the old blade removed, you can now install a new blade and get back to work.
Installation of the New Blade
Choosing the Right Blade
Before installing a new blade on your Ryobi circular saw, it is important to choose the right blade for the job. The type of blade you choose will depend on the material you are cutting and the type of cut you need to make.
Ryobi circular saws are compatible with a variety of blades, including:
- Rip blades: designed for making long, straight cuts along the grain of the wood.
- Crosscut blades: designed for making cuts across the grain of the wood.
- Combination blades: designed for both ripping and crosscutting.
- Plywood blades: designed for cutting thin sheets of plywood.
- Metal cutting blades: designed for cutting metal.
Once you have chosen the right blade for your job, you can move on to installing the new blade.
Securing the New Blade
To install a new blade on your Ryobi circular saw, follow these steps:
- Unplug the saw or remove the battery to ensure it is not accidentally turned on during the installation process.
- Loosen the blade nut using a wrench or the included blade wrench.
- Remove the old blade and any washers or spacers.
- Place the new blade onto the arbor, making sure that the teeth are facing forward and the blade is properly aligned with the saw.
- Replace any washers or spacers that were on the old blade onto the new blade in the same order.
- Tighten the blade nut securely, making sure the blade is not loose.
- Double-check that the blade is properly aligned and tightened before using the saw.
It is important to note that the blade nut should always be tightened securely to prevent the blade from coming loose during use. Additionally, it is recommended to periodically check the blade for wear and tear and replace it as needed for optimal performance and safety.
Post-Installation Checks
After installing a new blade on a Ryobi circular saw, it’s important to perform a few post-installation checks to ensure that everything is working properly. This section will cover two important checks: Blade Alignment and Test Run.
Blade Alignment
The first post-installation check is to ensure that the blade is properly aligned. Misaligned blades can cause dangerous kickbacks or inaccurate cuts. To check the blade alignment, follow these steps:
- Unplug the saw and remove the battery if it’s cordless.
- Use a square or straight edge to check that the blade is perpendicular to the saw’s base plate. Place the square or straight edge against the blade and the base plate, and check that there are no gaps between the two.
- If the blade is not perpendicular, adjust the saw’s bevel angle until it is. Refer to the saw’s user manual for instructions on how to adjust the bevel angle.
Test Run
The second post-installation check is to perform a test run with the saw. This will help ensure that the blade is installed correctly and that there are no other issues with the saw. To perform a test run, follow these steps:
- Reattach the battery or plug the saw back in.
- Turn on the saw and let it run for a few seconds.
- Check that the blade is spinning smoothly and there are no unusual vibrations or noises.
- Make a few test cuts on scrap wood to ensure that the blade is cutting properly and that there are no issues with the saw’s motor or blade guard.
By performing these two post-installation checks, users can help ensure that their Ryobi circular saw is working properly and safely.
read also how to use ryobi circular saw
Conclusion
In conclusion, changing the blade on a Ryobi circular saw is a simple process that can be completed in just a few minutes with the right tools and knowledge. By following the steps outlined in this article, users can ensure that their saw is operating at peak performance and producing precise cuts every time.
One important thing to keep in mind is that safety should always be a top priority when working with power tools. Users should always wear appropriate safety gear, such as eye and ear protection, and should never attempt to change the blade on a saw that is still plugged in.
Another key takeaway is that it is important to choose the right blade for the job at hand. Users should consider the type of material they will be cutting, as well as the thickness and hardness of the material, when selecting a blade. This will help to ensure that the saw is able to make clean, accurate cuts without causing damage to the blade or the material being cut.
Overall, changing the blade on a Ryobi circular saw is a straightforward process that can be completed quickly and easily with the right tools and know-how. By following the steps outlined in this article and taking the necessary safety precautions, users can keep their saw in top condition and achieve professional-quality results on every project.

Reader Interactions