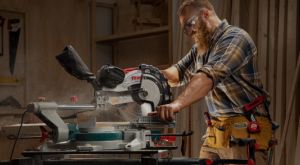
Sharpening a miter saw blade is an essential maintenance task that ensures accurate and efficient cuts. A dull blade can result in rough and uneven cuts, which can ruin your project and waste your time. Fortunately, sharpening a miter saw blade is a simple process that can be done with a few basic tools and some patience.
Before sharpening your miter saw blade, it’s important to inspect it for any damage or wear. Look for any chips, cracks, or missing teeth, as these can affect the blade’s performance and safety. If you notice any damage, it’s best to replace the blade rather than attempting to sharpen it.
Assuming your blade is in good condition, the next step is to remove it from the saw and secure it in a vise or clamp. From there, you can use a file or sharpening stone to remove any burrs or nicks and restore the blade’s sharpness. With a little practice, you can sharpen your miter saw blade quickly and easily, ensuring clean and precise cuts every time.
Understanding Miter Saw Blades
When it comes to sharpening a miter saw blade, it is important to first understand the different types of blades available. There are several types of miter saw blades, each designed for specific materials and cutting applications.
The most common types of miter saw blades are:
- Crosscut Blades: These blades are designed to make smooth cuts across the grain of the wood. They typically have a high tooth count and are ideal for cutting hardwoods and softwoods.
- Rip Blades: These blades are designed to make long, straight cuts along the grain of the wood. They typically have fewer teeth than crosscut blades and are ideal for cutting thicker materials.
- Combination Blades: These blades are designed to handle both crosscutting and ripping. They have a mix of teeth that are designed to provide a smooth finish and efficient cutting.
It is important to choose the right blade for your specific cutting needs. Using the wrong blade can result in poor cuts, damage to the material, and even injury.
When selecting a blade, consider the following:
- Blade Diameter: Miter saw blades come in various diameters, typically ranging from 8 to 12 inches. Choose a blade that matches the size of your saw.
- Tooth Count: The number of teeth on a blade affects the quality of the cut. Blades with a higher tooth count provide a smoother finish, while blades with fewer teeth cut faster.
- Blade Material: Blades can be made from various materials, including carbide, high-speed steel, and diamond. Carbide blades are the most durable and can handle the toughest materials.
By understanding the different types of miter saw blades and selecting the right blade for your cutting needs, you can ensure a clean and efficient cut every time.
Safety Precautions
When sharpening a miter saw blade, safety should always be the top priority. Here are a few important safety precautions to follow:
- Always wear protective gear such as safety goggles, gloves, and earplugs when working with a saw blade.
- Make sure the saw is unplugged and the blade has stopped moving before attempting to sharpen it.
- Use a proper sharpening tool and follow the manufacturer’s instructions carefully.
- Keep your hands and fingers away from the blade at all times.
- Never attempt to sharpen a blade that is damaged or has missing teeth. Replace it instead.
- Always work in a well-lit and well-ventilated area to avoid accidents.
By following these safety precautions, you can minimize the risk of injury and ensure a successful and safe sharpening process.
Tools Needed for Sharpening
To sharpen a miter saw blade, I will need the following tools:
- A flat file
- A diamond file
- A vise or clamp
- Safety goggles
- A cleaning brush
- A marker
The flat file is used to remove any large nicks or chips in the blade. The diamond file is used for honing and sharpening the blade. A vise or clamp is necessary to hold the blade securely in place while sharpening. Safety goggles are essential to protect my eyes from any metal shavings that may fly off during the sharpening process. A cleaning brush is needed to remove any debris from the blade before and after sharpening. Lastly, a marker is used to mark the teeth that have been sharpened to keep track of my progress.
It is important to note that the type of file and diamond file needed may vary depending on the type of blade being sharpened. It is crucial to use the correct tools to ensure the best results and prevent damage to the blade.
Signs That Your Blade Needs Sharpening
As a DIY enthusiast, I know that a dull miter saw blade can ruin any woodworking project. It can cause rough cuts, tear-outs, and even kickbacks, which can be dangerous. Therefore, it’s essential to keep an eye out for signs that your blade needs sharpening.
Here are some of the signs that your miter saw blade needs sharpening:
- Burn marks: If you notice burn marks on your wood after cutting, it’s a sign that your blade is dull. A dull blade generates more heat, which can scorch the wood and create burn marks.
- Rough cuts: If your blade is dull, it won’t cut smoothly through the wood, resulting in rough cuts. You’ll notice that the edges of your wood will be uneven, and the surface will be rough.
- Tear-outs: A dull blade can cause the wood to tear out, leaving an uneven and jagged edge. Tear-outs can ruin the look of your project, and you’ll have to sand it down to fix it.
- Increased resistance: If you notice that your saw is struggling to cut through the wood, it’s a sign that your blade is dull. A dull blade requires more force to cut through the wood, which can strain your saw’s motor.
If you notice any of these signs, it’s time to sharpen your miter saw blade. Sharpening your blade not only improves the quality of your cuts but also prolongs the life of your saw.
Removing the Blade from the Saw
Before sharpening your miter saw blade, you need to remove it from the saw. Here are the steps to follow:
- Unplug the saw from the power source to avoid any accidents.
- Loosen the blade guard and lift it up to expose the blade.
- Use a wrench to loosen the bolt that holds the blade in place. Turn the bolt counterclockwise to loosen it.
- Remove the bolt and washer and carefully take the blade out of the saw. Be sure to hold the blade by the center and the teeth to avoid injury.
If you’re having trouble loosening the bolt, you can use a blade wrench or a pair of pliers to hold the blade in place while you loosen the bolt. Once the blade is removed, you can inspect it for any signs of damage or wear before proceeding with the sharpening process.
Remember to handle the blade with care and wear protective gloves to avoid injury.
Cleaning the Blade
Keeping the blade clean is essential for a sharp and accurate cut. Here are the steps I follow to clean my miter saw blade:
- Disconnect the saw from the power source.
- Remove the blade from the saw and place it on a clean surface.
- Use a soft-bristled brush to remove any debris or sawdust from the blade teeth and the blade body. Make sure to brush in the direction of the teeth to avoid damaging them.
- Use a damp cloth to wipe the blade clean. Avoid using harsh chemicals or abrasive materials that could damage the blade.
- Dry the blade thoroughly with a clean cloth.
- Inspect the blade for any signs of damage or wear. If you notice any chips, cracks, or missing teeth, it may be time to replace the blade.
By following these steps, you can keep your miter saw blade clean and in good condition, which will help ensure accurate and efficient cuts.
Inspecting the Blade
Before sharpening your miter saw blade, it’s important to inspect it thoroughly. This will help you identify any damage or wear that may affect the blade’s performance. Here are the steps to follow when inspecting your miter saw blade:
- Remove the blade from the saw – To inspect the blade, you will need to remove it from the saw. Follow the manufacturer’s instructions for removing the blade, and make sure to wear gloves to protect your hands.
- Check for damage – Look for any signs of damage, such as cracks, chips, or missing teeth. If you see any damage, it’s best to replace the blade rather than trying to sharpen it.
- Check for wear – Examine the teeth of the blade to see if they are worn down. If the teeth are significantly shorter than they were when the blade was new, it may be time to replace the blade.
- Clean the blade – Use a wire brush to remove any debris or buildup from the blade. This will help you get a better look at the blade and ensure that it is ready for sharpening.
By inspecting your miter saw blade before sharpening it, you can ensure that it is in good condition and ready to be sharpened. If you notice any damage or significant wear, it’s best to replace the blade rather than risking a poor performance or even injury.
Sharpening the Blade
When it comes to sharpening a miter saw blade, it’s important to follow the right steps to ensure that the blade is sharpened properly. Here are the steps I follow when sharpening my miter saw blade:
Sharpening the Teeth
The first step in sharpening a miter saw blade is to sharpen the teeth. I use a diamond file to sharpen each tooth individually. I start at the base of the tooth and work my way up to the tip. I repeat this process for each tooth until the entire blade is sharpened.
Balancing the Blade
After sharpening the teeth, it’s important to balance the blade. A balanced blade will provide a smoother cut and will reduce the risk of the blade wobbling or vibrating during use. To balance the blade, I use a blade balancing kit. I attach the kit to the blade and adjust the weights until the blade is perfectly balanced.
Polishing the Blade
The final step in sharpening a miter saw blade is to polish the blade. Polishing the blade will remove any burrs or rough spots that may have been left after sharpening. I use a polishing wheel and a polishing compound to polish the blade. I apply the compound to the wheel and run the blade through the wheel several times until the blade is shiny and smooth.
By following these steps, I’m able to sharpen my miter saw blade quickly and effectively. Remember to take your time and be careful when sharpening the blade to avoid injury.
Reinstalling the Blade
Once you have finished sharpening your miter saw blade, it’s time to reinstall it. Follow these steps to ensure the blade is properly installed:
- First, clean the arbor and blade washer with a dry cloth to remove any debris or dirt that may have accumulated during the sharpening process.
- Place the blade back onto the arbor, making sure that the teeth are facing in the correct direction. The teeth should be pointing down towards the table of the saw.
- Next, place the blade washer back onto the arbor, followed by the arbor nut. Tighten the nut securely using a wrench, but be careful not to overtighten it.
- Finally, use a blade wrench to rotate the blade to ensure that it spins freely and does not wobble or vibrate. If the blade is not spinning smoothly, you may need to adjust the installation or tighten the arbor nut further.
Remember, a properly installed and sharpened miter saw blade will help you achieve clean and precise cuts every time.
Read Also
How to Easily Unlock Your Craftsman Miter Saw
Conclusion
In conclusion, sharpening a miter saw blade is a simple process that can help you achieve cleaner and more accurate cuts. With the right tools and techniques, you can easily maintain your blade and extend its lifespan.
To summarize, here are the key takeaways from this article:
- Always wear protective gear when working with power tools.
- Use a specialized blade sharpening tool or a file to sharpen the blade.
- Follow the manufacturer’s instructions for removing and re-installing the blade.
- Check the blade for damage or wear before sharpening it.
- Take your time and use a consistent angle when sharpening the blade.
- Test the blade after sharpening to ensure that it’s working properly.
By following these tips, you can keep your miter saw blade in top condition and achieve the best possible results. Remember to take your time and work carefully, and you’ll be able to enjoy cleaner, more accurate cuts for years to come.

Reader Interactions