Changing the blade on a miter saw can seem like a daunting task, especially if you’ve never done it before. However, it’s a simple process that can be completed in just a few steps. With the right tools and a little bit of know-how, you can easily swap out the blade on your miter saw and get back to work in no time.
The first step in changing the blade on a miter saw is to make sure the saw is unplugged and the blade is fully stopped. Next, you’ll need to remove the blade guard and loosen the bolt that’s holding the blade in place. Once the bolt is loose, you can remove the old blade and replace it with a new one. Tighten the bolt back up, replace the blade guard, and you’re ready to start cutting again.
Understanding the Miter Saw
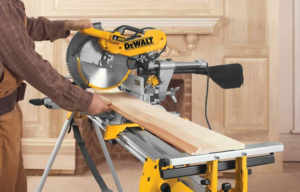
A miter saw is a type of power saw used to make accurate crosscuts and angled cuts on wood, metal, and other materials. It is a versatile tool that can be used in a variety of projects, from simple DIY tasks to more complex woodworking projects.
The basic components of a miter saw include a blade, a motor, a base, and a fence. The blade is the cutting tool that spins at high speed to make the cuts. The motor provides the power to drive the blade. The base is the platform on which the material to be cut is placed. The fence is the guide that helps to keep the material in place and ensure accurate cuts.
Miter saws come in different sizes and types, including compound miter saws, sliding compound miter saws, and dual-bevel sliding compound miter saws. Compound miter saws can make angled cuts in two directions, while sliding compound miter saws can make wider cuts. Dual-bevel sliding compound miter saws can make angled cuts in both directions without having to flip the material.
It’s important to understand the features and capabilities of your miter saw before attempting to change the blade. Always refer to the manufacturer’s instructions for specific guidance on your particular model.
Safety Precautions Before Changing the Blade
As someone who has changed the blade on a miter saw many times, I know that it can be a dangerous task if not done properly. Before you even think about changing the blade, it’s important to take some safety precautions to protect yourself and others around you.
First, make sure the saw is unplugged. This may seem obvious, but it’s easy to forget in the heat of the moment. You don’t want to accidentally turn the saw on while changing the blade and risk serious injury.
Next, wear appropriate personal protective equipment (PPE). This includes safety glasses, gloves, and a dust mask. The glasses will protect your eyes from any flying debris, the gloves will give you a better grip on the blade and prevent cuts, and the dust mask will protect your lungs from any sawdust.
It’s also important to secure the saw in place. You don’t want it moving around while you’re changing the blade. Use clamps or a vice to keep the saw in place and make sure it’s stable.
Finally, read the manufacturer’s instructions carefully. Different saws may have different procedures for changing the blade, and it’s important to follow them to ensure the job is done safely and correctly.
By taking these safety precautions, you can change the blade on your miter saw with confidence and avoid any unnecessary accidents.
Tools Required for Changing the Blade
When it comes to changing the blade on a miter saw, having the right tools is essential. Here are the tools you will need to successfully change the blade on your miter saw:
Blade Wrench
The blade wrench is a crucial tool for changing the blade on a miter saw. It is used to loosen and tighten the bolt that holds the blade in place. The blade wrench should fit the bolt on your miter saw perfectly. If you don’t have a blade wrench that fits your miter saw, you can usually purchase one from the manufacturer or a hardware store.
Screwdriver
In addition to the blade wrench, you will also need a screwdriver to remove any screws or bolts that are holding the blade guard in place. The screwdriver should be the appropriate size for the screws or bolts on your miter saw.
New Blade
Of course, you will also need a new blade to replace the old one. Make sure to purchase a blade that is compatible with your miter saw. Check the size of the blade and the arbor hole size to ensure that it will fit your saw.
With these tools in hand, you will be well-equipped to change the blade on your miter saw. Remember to always follow the manufacturer’s instructions and safety guidelines when working with power tools.
Step by Step Guide to Change the Blade
Changing the blade on a miter saw is a simple process that can be done in a few easy steps. Here is a step by step guide to help you change the blade on your miter saw.
Unplugging the Miter Saw
Before you start changing the blade on your miter saw, make sure that the saw is unplugged. This will ensure that you don’t accidentally turn on the saw while you are changing the blade.
Removing the Blade Guard
The first step in changing the blade on your miter saw is to remove the blade guard. This is usually held in place by a few screws or bolts. Use a screwdriver or wrench to remove the screws or bolts and then lift the blade guard off the saw.
Removing the Old Blade
Once the blade guard is removed, you can remove the old blade. To do this, you will need to use a wrench to loosen the bolt that holds the blade in place. Turn the bolt counterclockwise to loosen it and then remove the bolt and the washer. You should then be able to lift the old blade off the saw.
Installing the New Blade
To install the new blade, you will need to follow the same steps in reverse order. Place the new blade onto the saw and then replace the washer and bolt. Use the wrench to tighten the bolt by turning it clockwise.
Reattaching the Blade Guard
The final step in changing the blade on your miter saw is to reattach the blade guard. Line up the screw holes on the blade guard with the holes on the saw and then use the screws or bolts to attach the blade guard. Tighten the screws or bolts securely.
That’s it! By following these simple steps, you can change the blade on your miter saw quickly and easily.
Read Also what size miter saw to cut 4×4
Conclusion
In conclusion, changing the blade on a miter saw is a simple and straightforward process that can be completed with minimal effort. By following the steps outlined in this guide, you can replace the blade on your saw quickly and safely.
Remember to always wear protective gear, such as safety glasses and gloves, when working with power tools. Additionally, be sure to use the correct blade for your saw and the material you are cutting.
Regularly inspect your blade for signs of wear and tear, and replace it as needed to ensure optimal performance and safety. With proper maintenance and care, your miter saw can provide years of reliable service.

Reader Interactions